🎨

The Game Of Color

Experience The World of Cinematic Color Grading Like Never Before

What will you learn in this

Primary grading or balancing

The first step in color correction is balancing the color, which is achieved using the primary correction tools found at the bottom left of the screen. These tools impact the entire image and are essential for adjusting brightness and color levels, removing unwanted tints, and establishing a neutral baseline. Each color wheel corresponds to a specific tonal range, allowing you to click and drag within the wheel to refine its color, while the master dial beneath adjusts its overall intensity. This palette also includes controls for fine-tuning adjustments, primary bars, and log controls. Once the shots are balanced, you can move on to the creative grading phase to craft distinctive visual styles.

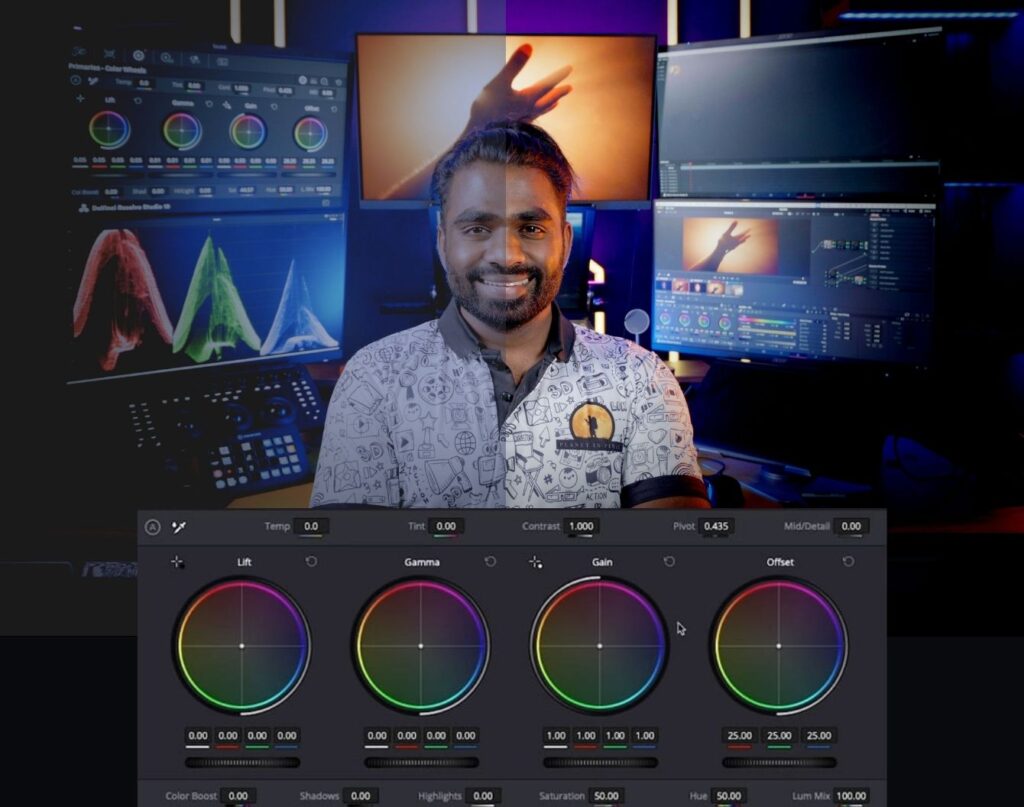
Adjust contrast and colour with curves

While primary wheels provide broad adjustments, curves offer a more refined way to shape the color and contrast of an image with precision. You can access curves by clicking the first icon in the center palette. These tools allow you to tweak specific regions of the image based on hue, luminance, or saturation. The default “custom” curves enable independent adjustments for red, green, blue, and luminance channels, with a live histogram to guide your changes. Additionally, there are five specialized curves that let you modify one property based on another, such as adjusting luminance or saturation for a selected hue. For instance, the Hue Vs Sat curve allows you to choose a specific hue and modify its saturation.

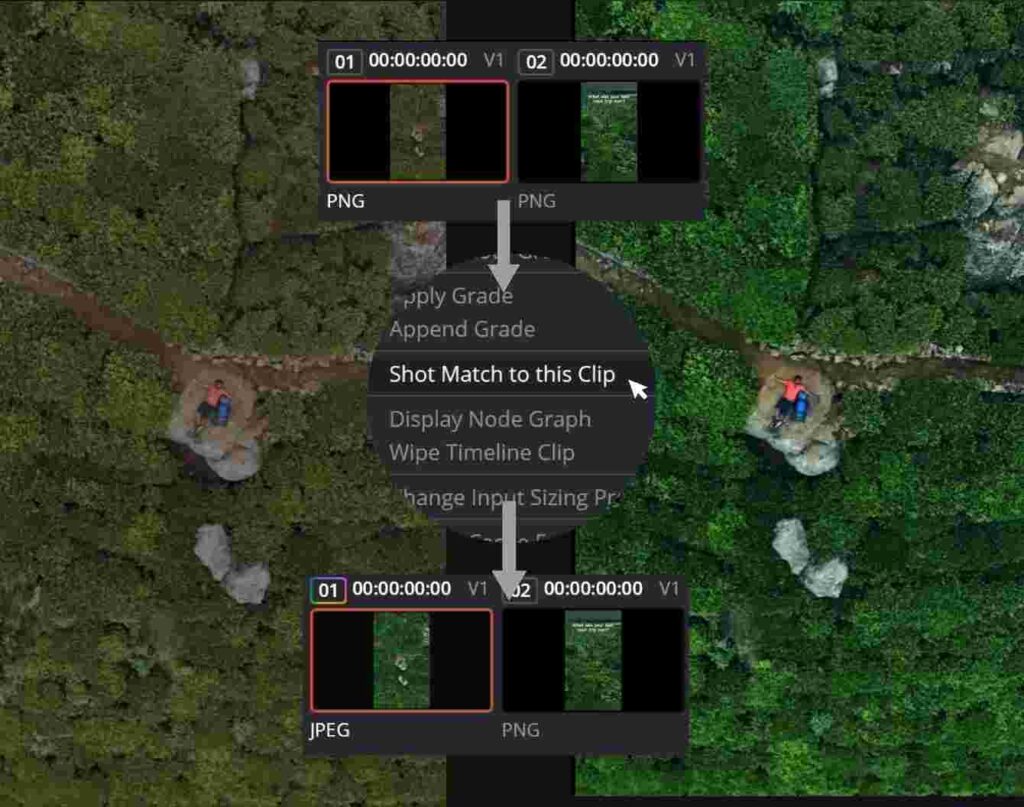
Auto balancing and matching

Creating consistent-looking content from different cameras starts with balanced and matched shots. The auto balance tools make it easy to quickly adjust a group of similar shots. Simply click the auto color button on the left side of the color wheels palette to automatically balance the color and contrast of a shot. You can also match colors between different clips by selecting a clip, right-clicking on another, and choosing “Shot Match to This Clip” from the menu. Resolve will adjust the color, contrast, and brightness of the selected clip to align with the reference. For shots containing a chip chart, use the color match icon in the toolbar, choose the chart type, align it with the image, and click match for precise results!

Planet In Pixel

" Where every pixel has a purpose "

0 M +

Social Media Views

0

Years Of Experience

0 +

5⭐ Google Reviews

0 +

Happy Students

Enhance Images with Resolve FX

Many image editing platforms feature a vast library of FX plug-ins, designed to enhance visuals and apply a wide range of effects. These plug-ins are typically organized by categories such as blurs, color effects, glows, lens flares, vignettes, beauty tools, image restoration, sharpening, stylization, textures, transformations, and warpers. Many platforms also offer customizable settings within these effects, allowing users to fine-tune their results for more precise control.

Secondary colour correction

Targeting a specific area for color correction is known as “secondary grading.” This technique allows you to alter elements like the color of a shirt without affecting the rest of the image. The qualifier palette is the tool for this, enabling selections based on hue, saturation, or luminance. Begin by clicking the eyedropper in the toolbar and dragging it over the viewer to choose the desired area. The selection will appear highlighted in the hue, saturation, and luminance strips. Activate the magic wand icon in the viewer to visualize the selection or “key.” Refine the selection using the qualifier controls, then apply adjustments with wheels, curves, and other tools to achieve the perfect result!

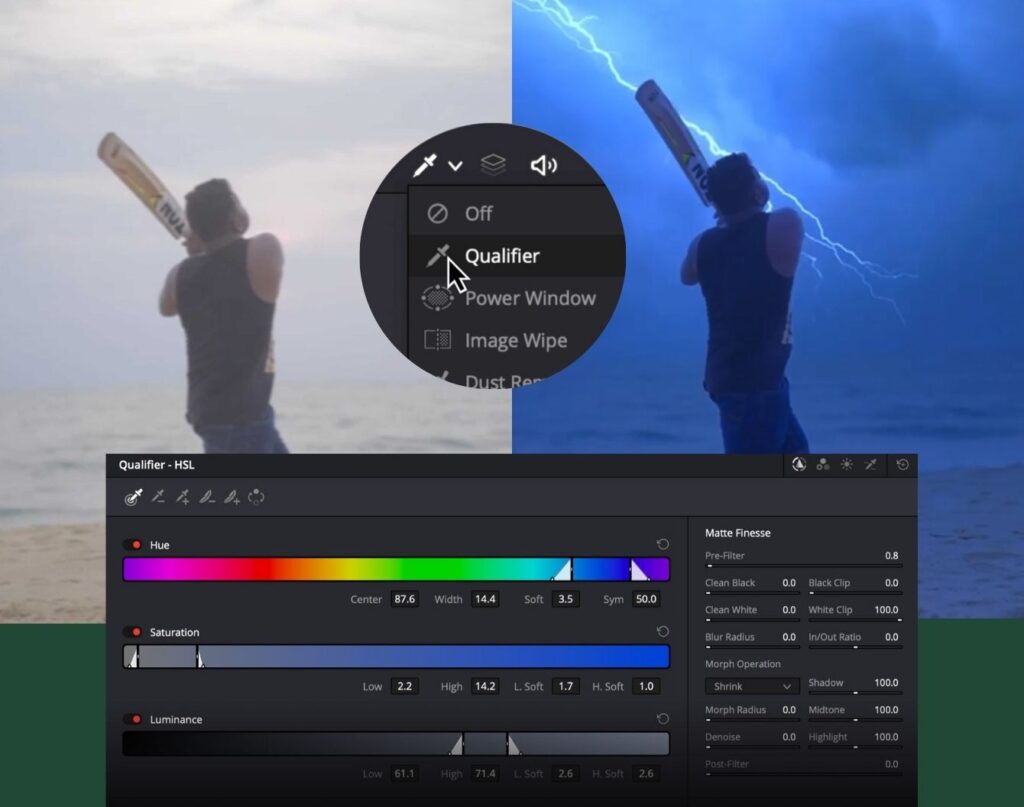
Target objects using power windows

While qualifiers allow you to isolate parts of an image based on color, luminance, or saturation, Power Windows enable you to define selections by drawing shapes around specific elements within a scene. By clicking the Power Window icon, you’ll access a palette with various geometric shapes, as well as a pen tool and gradient tool. Select the shape you need, and it will appear in the viewer, where you can adjust its size, position, and edge softness using on-screen controls. You can also fine-tune parameters like pan, rotation, size, and softness manually for greater precision. Once the shape is in place, you can apply color corrections to areas inside or outside the defined region.

Profesional scopes​

Color appears differently on various screens, and even human perception can change based on lighting conditions. To ensure consistency, professional scopes provide a reliable way to analyze image data. The scopes palette, found at the bottom right of the interface, offers five distinct scopes for accurate measurement and evaluation of color. These tools help you monitor tonal ranges, fine-tune skin tones, balance shots, and match clips seamlessly. Scopes visually represent key aspects of color, including luminance, chrominance, saturation, hue, color gamut, white point, and individual RGB channels, giving you precise control over every element of your image.

Take your grading to next level

The color page offers an incredibly versatile and comprehensive suite of features to help you craft stunning visuals. Whether you’re a beginner exploring color grading, an aspiring professional, or an experienced Hollywood colorist, it provides creative tools to bring your ideas to life and advanced technical tools to optimize your workflow and ensure top-tier image quality. With a robust color management system and full support for the latest HDR formats, it’s perfectly suited for high dynamic range projects. Additionally, you’ll find advanced tools for face retouching, beauty enhancement, blemish and object removal, noise reduction, film grain effects, restoration, and much more, empowering you to achieve cinematic results with ease.

Get Professional Results: Enroll Now to Learn Color Grading Like a Pro!

- "Grading done right, turns day into night."

Unlock the power of color grading and elevate your videos to a professional level—don’t miss out! This exclusive course will teach you essential techniques that industry experts use to create stunning visuals.
 If you wait too long, you’ll miss the chance to master skills that can set you apart in a competitive field. Enroll now before it’s too late—without this knowledge, you could be leaving incredible potential on the table!